Announcements | April 17, 2026 | 3 min read
Scheduled Emails: Automated Guest Messaging with Better Visibility and Reliability
Learn how scheduled emails in ReservationKey work, how to set them up using custom date fields and email templates, and what recent updates improved visibility and reliability.
Scheduled emails in ReservationKey allow you to automatically send messages to guests based on important dates, like birthdays, anniversaries, or any custom date you collect. This is a simple but powerful way to stay connected with guests and drive repeat bookings without manual effort.
With recent updates, scheduled emails are now easier to manage, more transparent, and more reliable behind the scenes.
How Scheduled Emails Work
At a high level, scheduled emails are triggered by date-based custom fields tied to your guests. Once set up, the system checks daily and automatically sends emails to guests whose dates match your timing criteria.
For example:
- Send a birthday greeting on the guest's birthday
- Send an anniversary email a week before their special date
- Send a yearly reminder tied to any custom date you define
Step 1: Add Custom Date Fields
Start by creating one or more custom fields to store the dates you want to use.
Go to:
Website -> Custom Fields -> Add
- Choose a date field type, either Month/Day or Day/Month
- Enter a question, such as "When is your birthday?"
- Set whether the field is required on your reservation page
- Optionally enable internal visibility
- Add a mail merge code if you want to use the value in emails
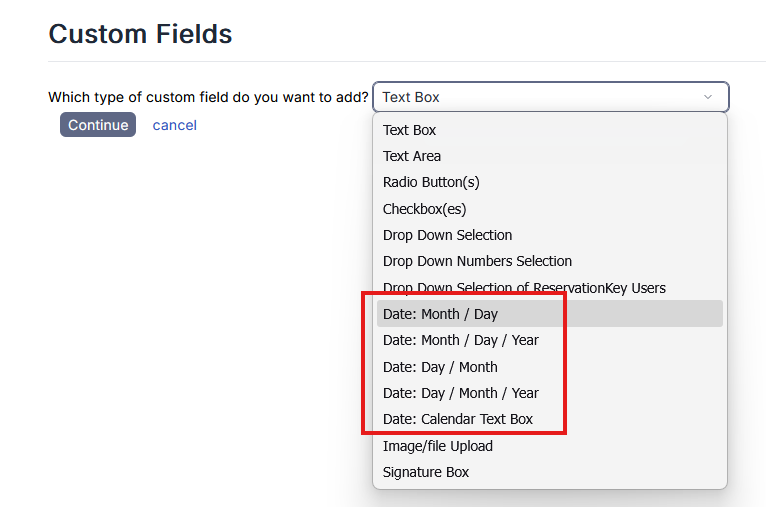
If you want guests to fill this out during booking, make sure to enable the field on your reservation page.
Once dates are entered, those guests automatically become eligible for scheduled emails.
Step 2: Create Email Templates
Next, create a template for each type of scheduled email.
Go to:
Website -> Email Templates -> Add Template
You can:
- Customize subject and message content
- Include attachments, such as coupons or special offers
- Use guest-related merge fields such as
\{\{guestfirstname\}\},\{\{guestlastname\}\},\{\{guestemail\}\},\{\{guestphone\}\}, and more
Note: Since scheduled emails are not tied to a specific reservation, reservation-specific merge fields will not apply.
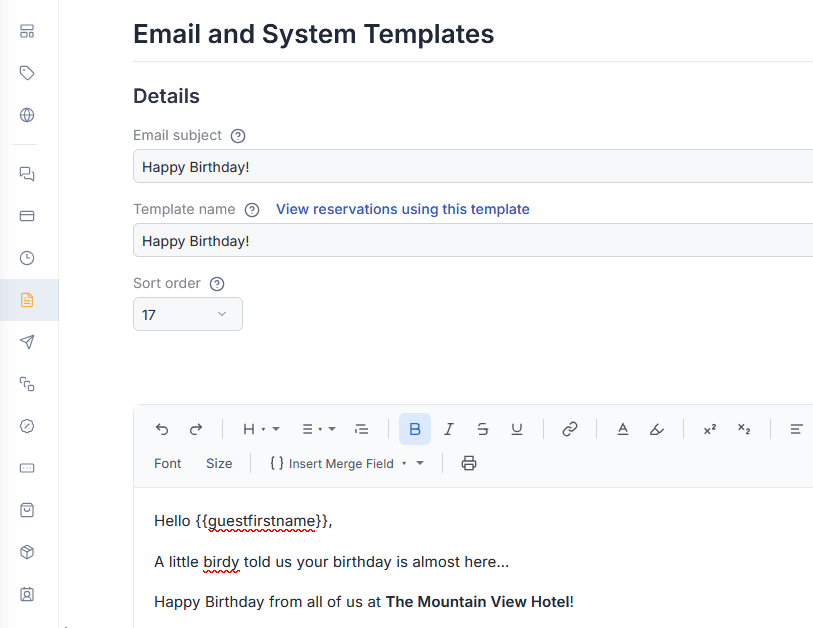
Step 3: Schedule the Email
Go to:
Reservation Manager -> Guests -> Scheduled Emails
Click Add Scheduled Email, then:
- Select your email template
- Choose the date source, such as birthday or anniversary
- Set timing, before, after, or on the date
- Define sender, recipient, and optional CC/BCC
Once saved, the system automatically processes scheduled emails daily and sends messages to matching guests each year based on the date.
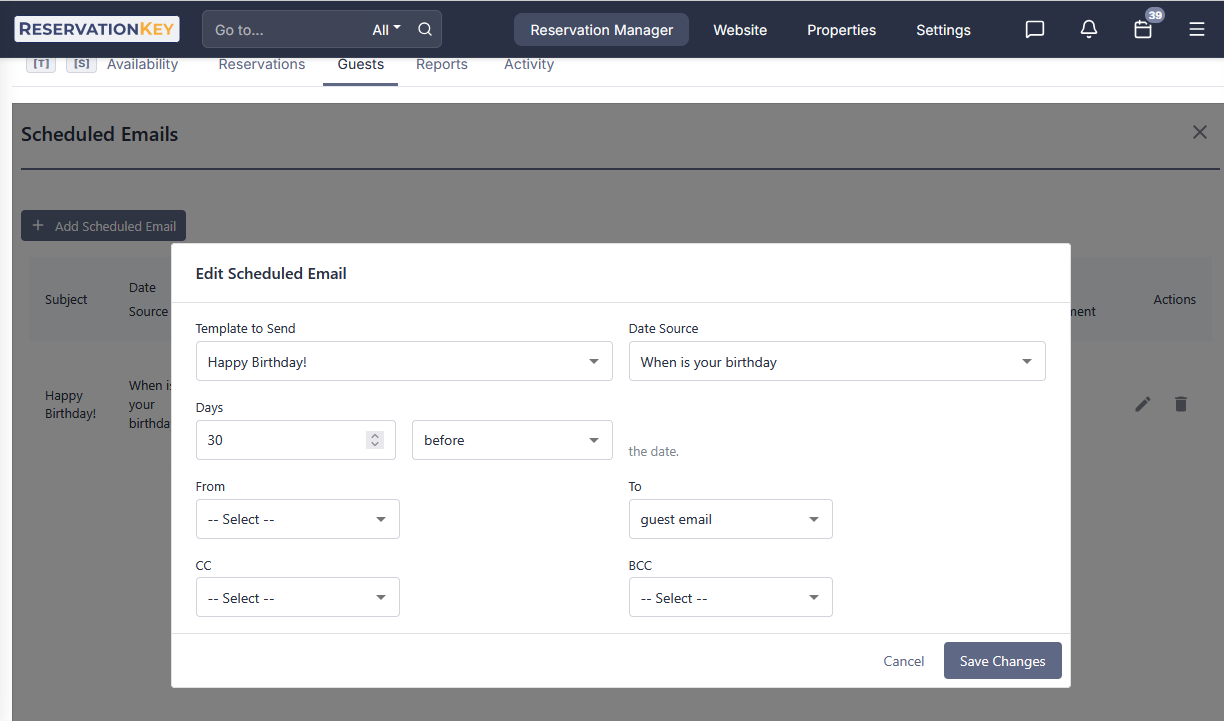
See Exactly Who Will Receive Emails
One of the biggest improvements is visibility.
In the Guests -> Scheduled Emails section, the counts for Yesterday / Today / Tomorrow are now clickable. Clicking these shows a detailed list of recipients, including:
- To / CC / BCC
- Subject line
- Email addresses
You can also click directly from a recipient to jump to their reservation, making it much faster to review or make updates.
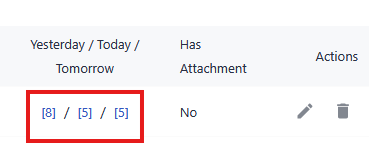
Cleaner, More Accurate Recipient Data
We fixed an issue where some scheduled emails, especially date-based ones like birthdays, were missing recipient details.
Now:
- Guest data is reliably pulled from the correct source
- Email addresses and names display correctly
- You can trust that emails are going to the right people
A More Complete Scheduled Email System
With these updates, scheduled emails are now much more polished and dependable.
You can:
- Automatically send recurring emails based on guest dates
- Quickly see exactly who will receive emails
- Jump directly to guest records for review
- Rely on accurate data and consistent delivery
Overall, scheduled emails are now easier to use, easier to troubleshoot, and a more dependable way to stay connected with your guests year after year.