It is super easy to add your own clickable map for use both by your guests on your public booking page, as well as for your own internal use.
Here are a couple of examples, to show what we mean.
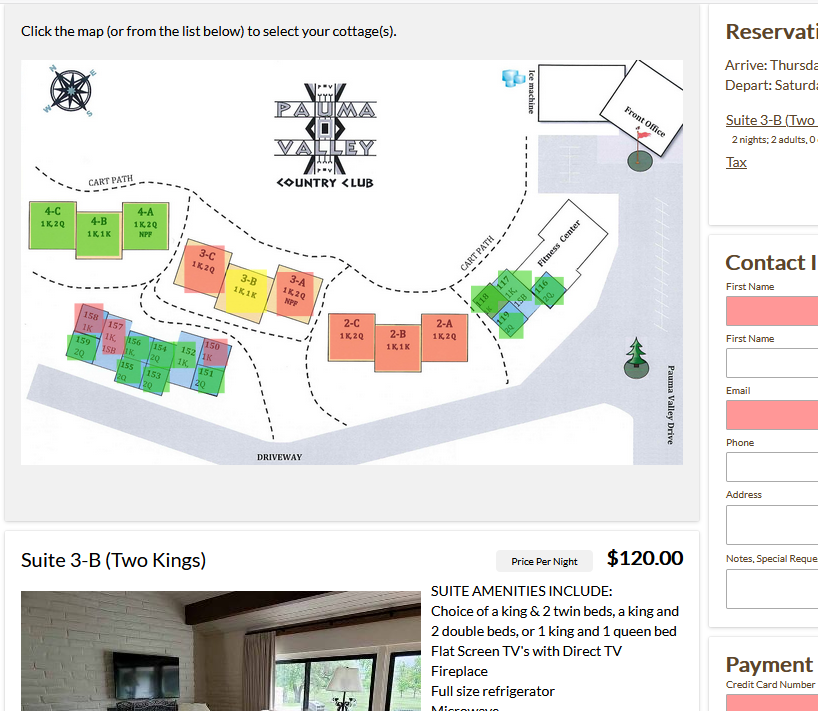
(Golf course with cottages)
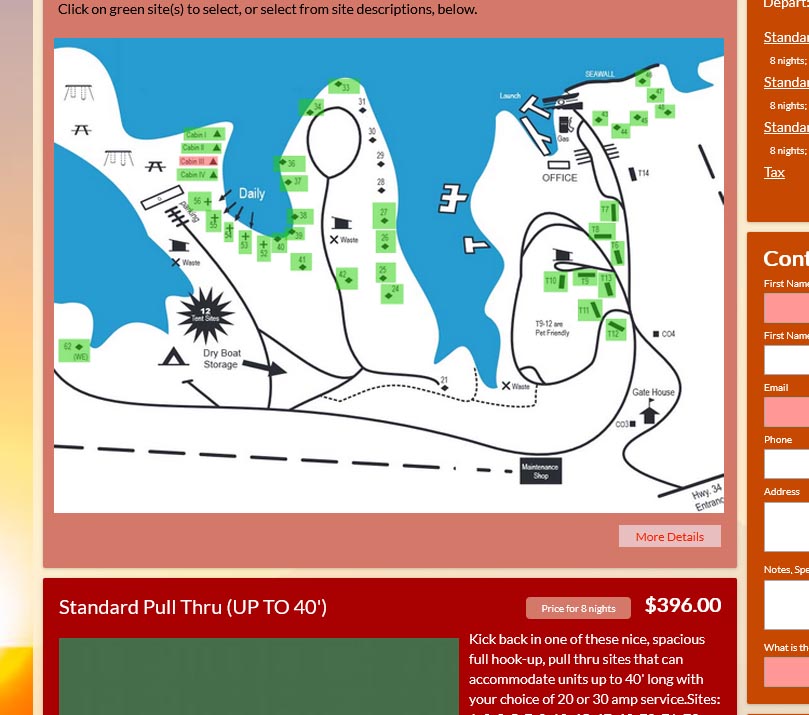
(Campground)
Here are the steps to set this up:
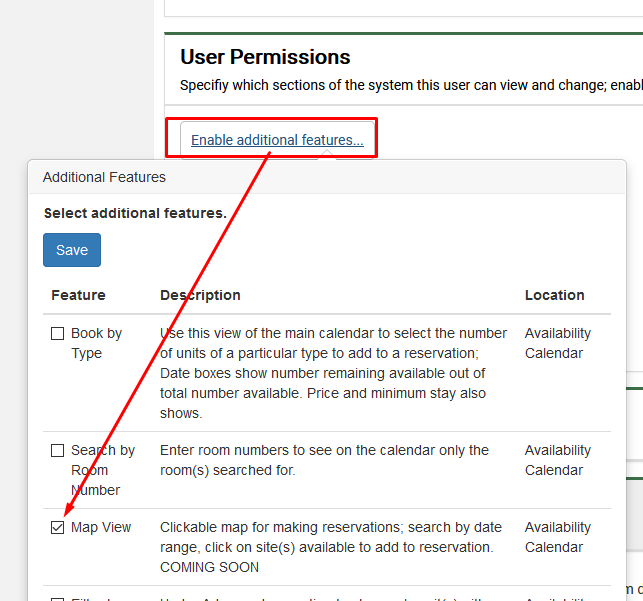
1. Enable the map feature.
Go to Settings, Users, and click into each user that should have this feature. There, expand User Permissions, click “Enable additional features…” and then check Map View and click save.
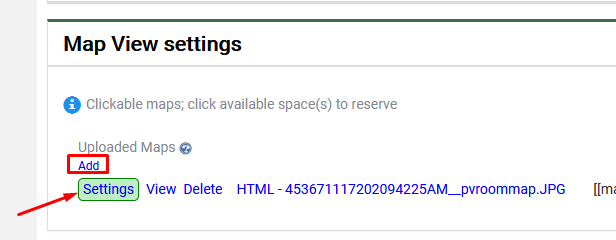
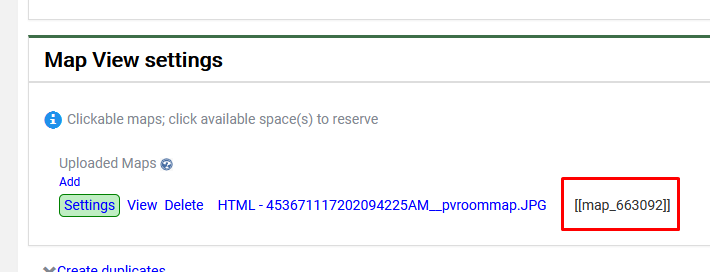
2. Upload your map(s).
Go to the Properties tab, click into your property, and expand the section Map View Settings. Upload your map and then click the green Settings button.
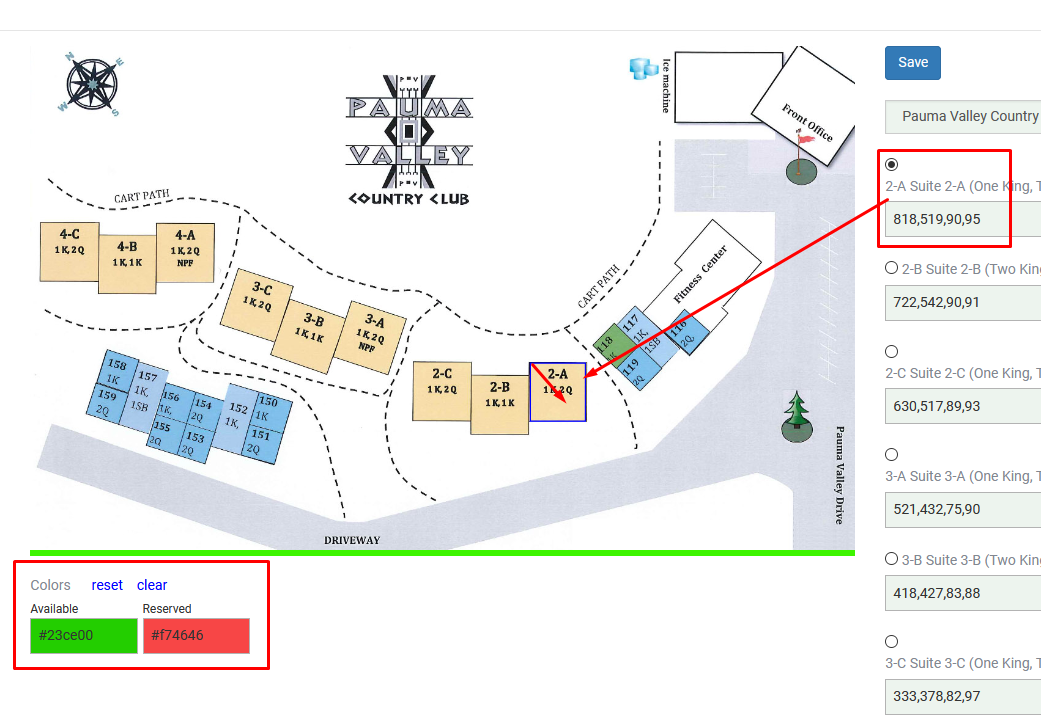
3. Define reservable units.
Here we are matching your units to areas on your map. To do this, make sure the unit you want to define is selected on the left side. Then drag a box on the map over the area which shows that unit. Make sure to start in the upper left corner and drag downwards until the space is covered. Repeat for all the units on the map that you want to make clickable/reservable. You can also set the unavailable and available colors here. Be sure to click Save after defining all your spaces.
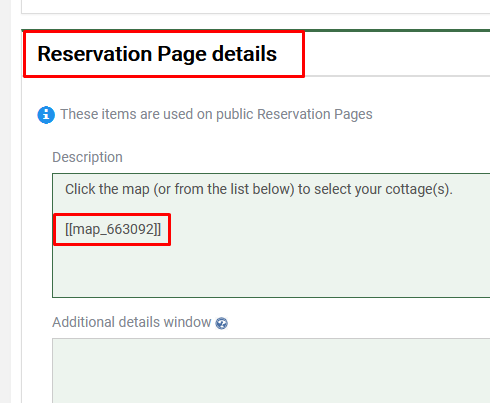
4. Add your map to your property description.
Copy the map code into where you want the map to appear in your property description. Once you have selected and copied the code, expand the Reservation Page details section and paste the code into your property description. You can add as many maps as you like to the property description. Most users need just one, but there certainly are situations where it is convenient to break a large map up into multiple smaller maps.
And that’s all there is to it. Now you can access the map internally as well as your guests can use it on your public reservation page(s).
Internally, you can find the map here:
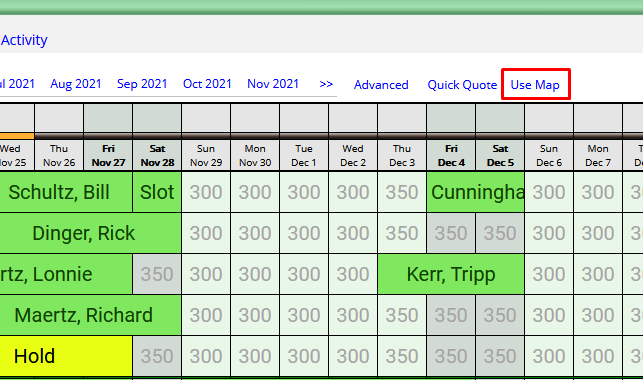
And it looks like this:
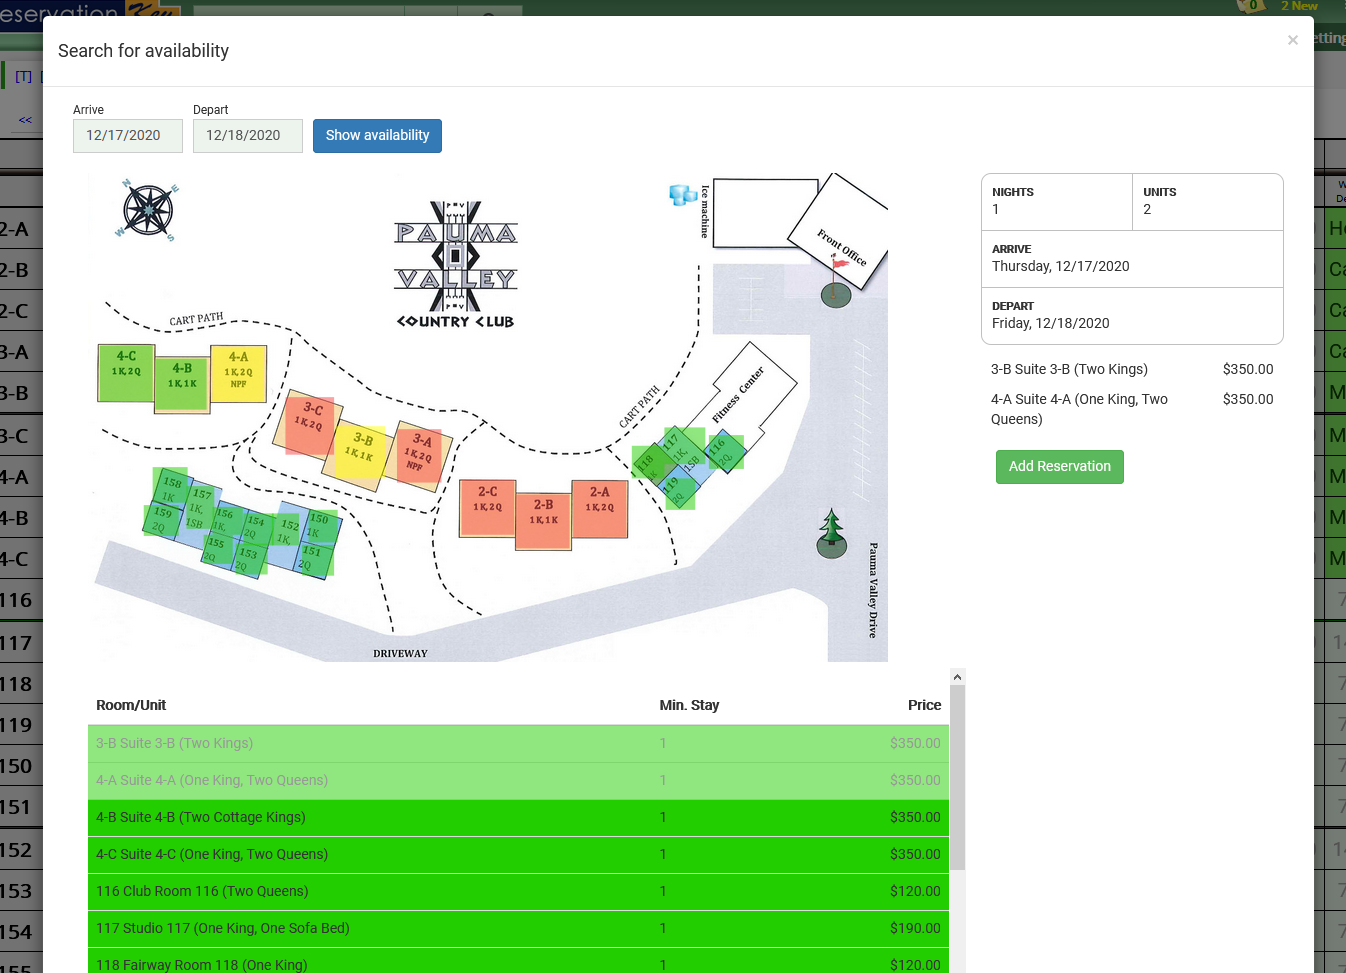
You can also watch your tutorial video here: